
How to Tap a Maple Tree: A Beginner's Step-by-Step Guide to Drilling, Setting a Spile, and Hanging Buckets
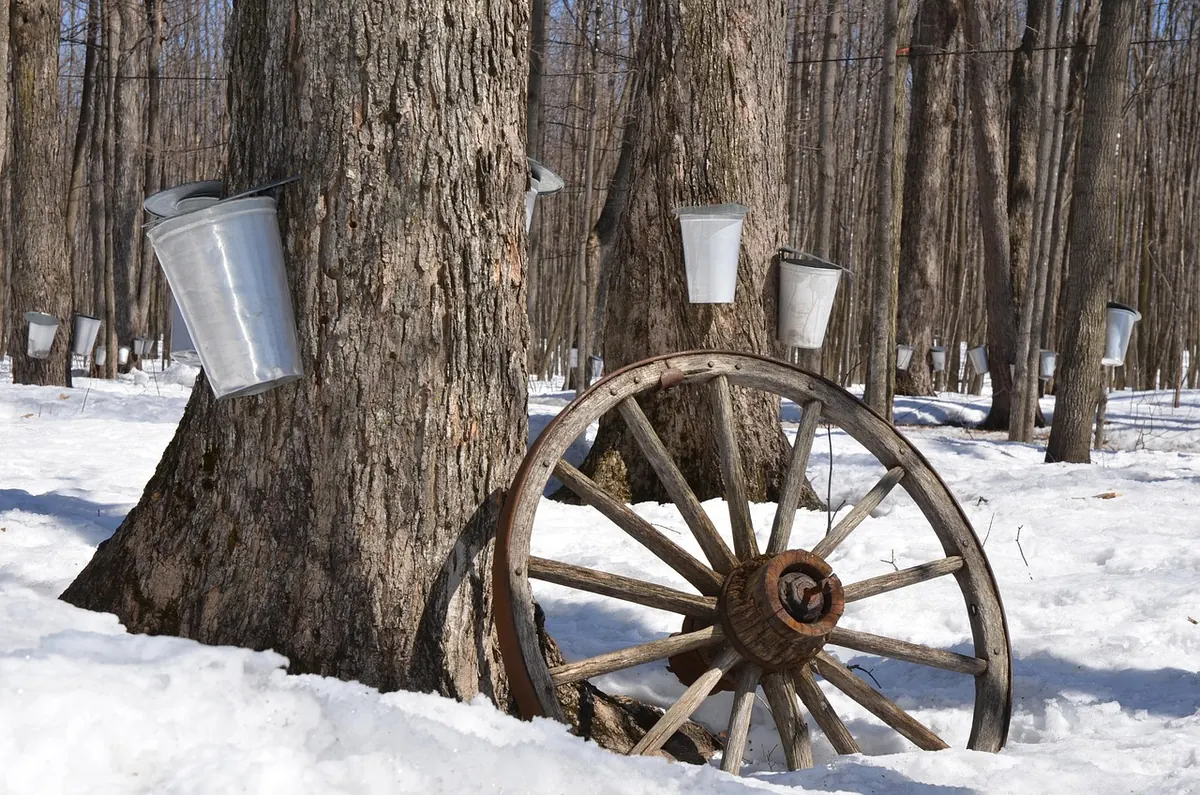
Maple sap runs when winter starts to loosen its grip. Nights are still below freezing, but daytime sun warms the trunks, pressure builds inside, and clear sap drips from a fresh wound. You can catch that drip with a drill, a spile, and a bucket. Tapping a few trees is not complicated, but small details matter: the tree you choose, the angle of the hole, the fit of the spile, and how clean you keep everything. Get those right and you can collect enough sap for a first small batch of syrup without harming the tree.
Choose a Tree Worth Tapping
Sugar maples give the sweetest sap, but red maples, silver maples, and boxelders can also be tapped. The tree's health matters more than the species. Look for a straight, vigorous trunk with a full crown and no signs of dieback, deep cracks, or recent damage. A tree growing in the open, where sun hits the trunk, often runs earlier and stronger than one crowded in a dense stand.
Size is the other gate. A trunk about 10 to 12 inches in diameter can take one tap. Larger trees can take two or even three, spaced well apart around the trunk. Never tap a tree smaller than that just because it is convenient. And always get permission before tapping on land you do not own. If you are tapping street trees or park trees, check local rules first; some places prohibit it. If you are unsure about ownership or regulations, ask your municipality or a licensed forester before drilling.
Timing is simple to read. Watch for the first stretch of days when the temperature climbs above freezing and nights fall back below. That freeze-thaw rhythm is what starts the run. In many regions that means late winter, but the exact week shifts with the weather. When the forecast looks right, tap. Waiting too long means missing the best flow.
Gather the Right Tools
You do not need a full sugarhouse setup. A clean, small kit is better than a crowded, dirty one. Before you head out, assemble:
- A cordless drill with a sharp bit sized to your spiles, commonly 5/16 inch or 7/16 inch
- Food-grade spiles, plastic or metal, one for each tap
- A hammer or mallet
- Food-grade buckets with lids, or sap bags and holders
- Bucket hooks or spile hooks
- A clean food-grade collection container, such as a large pot or food-safe pail
- A funnel and a clean cloth or sap filter
- A permanent marker and a notebook if you want to track trees and dates
Keep the drill bit clean and free of oil. Sap is food, and anything that touches it should be food-grade and washed. Avoid using old milk jugs, painted buckets, or containers that held chemicals. A little planning here saves a lot of doubt later.
Drill the Hole
Pick a spot on the trunk that is easy to reach, usually two to three feet above the ground for bucket collection. Choose smooth, healthy bark, ideally on the sunny side of the tree where sap warms first. Brush away loose bark and debris, but do not carve into the tree.
Hold the drill steady and bore at a slight upward angle, maybe 10 to 15 degrees, so sap can flow out and down the spile. Drill about 2 to 2.5 inches deep, just past the bark and into the sapwood. Do not drill through the trunk. Let the bit pull the shavings out as you go; do not blow into the hole to clear it. If the wood is dark or dry, you may have hit an old tap hole or a dead section. Move a few inches away and try again. A healthy hole shows pale, creamy wood and often a bead of sap within minutes.
Set the Spile and Hang the Bucket
Slide the spile into the hole and tap it in gently with a hammer. You want a snug seal, not a forced fit. A few firm taps are enough. If the bark starts to split or the spile sinks too easily, stop. The spile should sit level or angle slightly downward so sap runs out rather than pooling inside the hole.
Hang the bucket on the spile hook or a separate bucket hook. Put the lid on. The lid keeps rain, snow, insects, and bark out, and it slows evaporation on warm days. Check that the bucket hangs clear of the trunk so it does not rub and that it will not tip in wind. If you are tapping several trees, mark each bucket with the tree's location or a number. It helps you remember which trees run well and which ones you should skip next year.
Collect Sap Cleanly and Often
Sap starts clear and faintly sweet. Collect it before the bucket is full, especially on warm, windy days. Empty buckets at least once a day during a good run, and more often if the flow is heavy. Pour sap through a clean cloth or filter into a food-grade storage container. Keep that container cold: in a snowbank, in a refrigerator, or in a shaded, insulated spot.
Storage and Boiling
Sap is perishable. If you cannot boil within a few days, freeze it. Cloudy, stringy, or sour-smelling sap should be discarded. Boiling will not make spoiled sap safe to eat. When you boil, do it outside or in a well-ventilated space. A large volume of sap produces a lot of steam and a sticky film on everything indoors. A simple outdoor setup with a sturdy burner and a wide pan works for a first batch. Stir occasionally, watch the level, and keep children and pets away from the hot pan. If you plan to sell syrup or give it away widely, check your local food safety rules and any regulations that apply to maple products.
Pull the Spiles and Let the Tree Heal
As the season ends and buds swell, sap turns “buddy”: darker, stronger, and less pleasant for syrup. That is your signal to stop. Pull the spiles carefully, clean them, and store them dry. Do not plug the holes with twigs or wax. The tree seals its own wounds, and the holes will close over time. Give each tree a rest from the same spot next year. Move new taps a few inches away from old ones, and never reuse an old hole.
Start Small, Keep It Simple
Two or three healthy trees are plenty for a first season. Tap when the forecast gives you freeze-thaw days, collect often, keep everything clean, and boil outside. You may end up with a small jar of syrup, and that is fine. The point of a first year is to learn how your trees run, what your weather does, and how much sap you can handle. Next season, you will know exactly where to drill.
Photo: diapicard / Pixabay